
6015607 CLARKE
Document overview
- Manufacturer or author: Provided By digicamel.com
- PDF pages: 44
Technical content
OPERATION & MAINTENANCE INSTRUCTIONS ORIGINAL INSTRUCTIONS GC05/26 - Rev 1 MIG/MMA/TIG INVERTER WELDER MODEL NO: MIG250 MULTI PART NO: 6015607
Parts & Service: 020 8988 7400 / E-mail: Parts@clarkeinternational.com or Service@clarkeinternational.com INTRODUCTION Thank you for purchasing this CLARKE Welder. Before attempting to operate the machine it is essential that you read this manual thoroughly and carefully follow all instructions given. In doing so you will ensure the safety of yourself and that of others around you, and you can also look forward to the welder giving you long and satisfactory service. SPECIFICATIONS This welder is covered by regulations EN 60974-1:2018+A1:2019 / EN 60974- 10:2014+A1:2015, where the Duty Cycle is expressed as a percentage of time the machine may be used in a given period for a specified welding current. e.g. When welding at 140 Amps the machine may be used for 6 minutes (60%) in any10 minute period. Unpacked Weight (kg) 34.2 plus cables & leads Dimensions (l x w x h) (mm) 855 x 440 x 630 (with base & wheels fitted) Power Supply 230V~ 50Hz-1ph Connecting plugs Terminated bare ends Peak Input Power 11.73 kW Max Input Current II Max/II eff 51A/40A Output Welding Current MIG 30A-220A MMA 30A-220A TIG 30A-220A IP Rating IP21S Insulation Grade Class 1 - Grade H Suitable Electrode size MMA - 1.6 - 5.0mm TIG - 1.6 - 2.4mm Welding Wire size Steel - 0.8mm, 0.9mm & 1.0mm Aluminium - 1.0 -1.2mm Max wire feeding speed 24m/min. Wire spool capacity 5kg /15kg Welding Capacity (Mild Steel) 1-12 mm (MIG) 1-15 mm (MMA) 1-5 mm (TIG)
Parts & Service: 020 8988 7400 / E-mail: Parts@clarkeinternational.com or Service@clarkeinternational.com PRINCIPLES OF THE MACHINE The MIG250 Multi is an inverter type welding machine, suitable to carry out Gas and No Gas CO2 welding, MMA, TIG and MIG. The welder is mainly used for CO2 gas protected welding which has the advantages of high energy efficiency, strong arc penetration and small welding deformation. Weldable materials include low carbon steel, low alloy steel, high strength steel, stainless steel and aluminium alloy. Methods include full position spot welding, butt welding, fillet welding and lap welding. The stable welding process can be obtained by using pure CO2, CO2+Ar, CO2+ O2 and other protective gases. The torch is suitable for wire diameters of 0.8-1.0mm. Manual Metal Arc (MMA) welding uses a coated, consumable electrode (stick) to lay the weld. The arc melts the core of the electrode to produce drops of molten metal (weld pool) to create the welded joint. Because of the versatility and simplicity of MMA welding, it requires less skill and is used primarily to weld iron and steel (including stainless steel). but nickel and copper can also be welded using this method. MIG (Metal Inert Gas) welding allows you to fuse together two similar metals without altering the properties of the metal. A consumable wire electrode is continuously fed through the welding torch fitted with a concentric gas nozzle. the wire is connected to a high voltage supply which creates an electric arc between the electrode (the wire) and the workpiece. The arc is used to create the required heat to turn the metal into a molten state. The wire is used as both the electrode and as a filler. The gas is used to prevent oxidation and to shield the arc and the weld from atmospheric contamination. The choice of gas is dependent upon the material being welded. This machine is designed to be used for both metal ARC (MMA) and TIG welding. TECHNICAL FEATURES This welder adopts IGBT (insulated-gate bipolar transistor) soft switch inverter technology, the single-phase power input, after rectifying, will be converted to 20KHz high frequency AC by the IGBT, then the voltage drops after HF transformer, second rectification and filtering to be a welding suitable DC (Direct Current). Through this process, the dynamic response speed of the welded power supply is improved and makes it more compact. The control circuit controls the whole machine so that the welding power supply has good anti-grid fluctuation ability and excellent welding performance.
- The MIG250 Multi is equipped with high-speed ARM platform, adopting a unique fine waveform control method with low spatter and an elegant weld bead.
- The MIG250 Multi gives a freely adjustable arc shape with the “Arc Control” knob and can set the inductance of the arc.
Parts & Service: 020 8988 7400 / E-mail: Parts@clarkeinternational.com or Service@clarkeinternational.com
- The unique arc starting and burn back control technology greatly improve the arc starting success rate and achieves high-quality fast spot welding.
- The digitally controlled wire feeding system makes the wire feeding more stable.
- Synergic control in a MIG welding machine refers to a machine that automatically sets the welding parameters, according to the wire type, diameter and shielding gas. This is achieved by selecting either the amperage, wire feed speed or plate thickness required, with a single knob. The built-in database with synergic mode makes the welding easier.
- The digital operating panel is simple and intuitive. It can display the pre-set current and voltage and also the actual welding current and voltage.
- The fault error code function to diagnose any faults.
APPLICATIONS
- Welding lower carbon steel.
- Flat welding, vertical welding, overhead welding, horizontal welding and all position welding.
- Suitable for 0.8/1.0/1.2 solid wire.
- Acid, alkaline, stainless steel, low hydrogen welding rod when MMA function. SUITABILITY OF DIFFERENT METHODS When using the welder in a gasless configuration the shielding gas is created from the flux within the welding wire. MMA/Arc Welding Carbon Steel, Low Alloy Steel, Stainless Steel, Cast Iron. MIG Welding Carbon Steel, Mild Steel, Stainless Steel TIG Welding Carbon Steel, Low Alloy Steel, Stainless Steel, Cast Iron, Titanium, Copper + Brass. Metal Being Welded Suitable Gas Part number Mild Steel Carbon Dioxide (CO 2) 6000642 Stainless Steel Argon 6000663 Aluminium Thin Sheet Metal/Mild Steel Carbon Dioxide (CO2)/Argon Mix 6000662
Parts & Service: 020 8988 7400 / E-mail: Parts@clarkeinternational.com or Service@clarkeinternational.com THE MACHINE RATING PLATE
1 Name/address of manufacturer 9 Energy Supply symbol
2 Model Number 10 Range of Output
3 Part Number 11 Rated No-load Voltage
4 Welding Power Source 12 Conventional Load Voltage
5 British Standards applied 13 Insulation grade
6 Welding Process symbol 14 Rated Supply Voltage
7 Degree of Ingress Protection 15 Rated Maximum Supply Current
8 Welding Current symbol 16 Max Effective Supply Current
Parts & Service: 020 8988 7400 / E-mail: Parts@clarkeinternational.com or Service@clarkeinternational.com SAFETY PRECAUTIONS FOR ALL TYPES OF WELDING FAILURE TO FOLLOW THESE RULES MAY RESULT IN SERIOUS PERSONAL INJURY. GENERAL PRECAUTIONS BURN PREVENTION Wear protective clothing - gauntlet gloves designed for use in welding, apron, and protective shoes. Button shirt collar and pocket flaps and wear cuffless trousers to avoid entry of sparks and slag. Wear helmet with safety goggles or glasses with side shields underneath, appropriate filter lenses or plates (protected by clear glass). This is a MUST for welding (and chipping) to protect the eyes from radiant energy and spatter. Replace cover glass when broken, pitted, or spattered. Avoid oily or greasy clothing as a spark may ignite them. Hot metal should never be handled without gloves. First aid facilities and a qualified first aid person should be available unless medical facilities are close by for immediate treatment of flash burns of the eyes and skin. A hard hat should be worn when others work overhead. Flammable hair preparations should not be used by persons intending to weld or cut. NOTE: ALL protective wear incl. masks & head shields MUST comply with PPE Regulation (EU) 2016/425. TOXIC FUME PREVENTION Severe discomfort, illness or death can result from fumes, vapours, heat, or oxygen enrichment or depletion that welding (or cutting) may produce. Prevent them with adequate ventilation. NEVER ventilate with oxygen. Lead, cadmium, zinc, mercury and beryllium, bearing materials, when welded (or cut) may produce harmful concentrations of toxic fumes. Adequate local exhaust ventilation must be used, or each person in the area as well as the operator must wear an air- supplied respirator. For beryllium, both must be used. Metals coated with or containing materials that emit toxic fumes should not be heated unless coating is removed from the work surface, the area is well ventilated, or the operator wears an air-supplied respirator. Work in a confined space only when it is being force ventilated and, if necessary, while wearing an air-supplied respirator. Vapours from chlorinated solvents can be decomposed by the heat of the arc (or flame) to form PHOSGENE, a highly toxic gas, and other lung and eye irritating by-products. The ultraviolet (radiant) energy of the arc can also decompose trichloroethylene and perchloroethylene vapours to form phosgene. DO NOT WELD where solvent vapours can be drawn into the welding WARNING: AS WITH ALL MACHINERY, THERE ARE CERTAIN HAZARDS INVOLVED WITH THEIR OPERATION AND USE. EXERCISING RESPECT AND CAUTION WILL CONSIDERABLY LESSEN THE RISK OF PERSONAL INJURY. HOWEVER, IF NORMAL SAFETY PRECAUTIONS ARE OVERLOOKED, OR IGNORED, PERSONAL INJURY TO THE OPERATOR MAY RESULT.
Parts & Service: 020 8988 7400 / E-mail: Parts@clarkeinternational.com or Service@clarkeinternational.com atmosphere or where the radiant energy can penetrate to atmospheres containing even minute amounts of trichloroethylene or perchloroethylene. FIRE AND EXPLOSION PREVENTION Causes of fire and explosion are: 1. Combustibles reached by the arc, flying sparks, hot slag or heated material 2. Short circuits. BE AWARE that flying sparks or falling slag can pass through cracks, along pipes, through windows or doors and through wall or floor openings, out of sight of the goggled operator. To prevent fires and explosion keep equipment clean and operable, free of oil, grease, and (in electrical parts) of metallic particles that can cause short circuits. If combustibles are in the area, DO NOT weld. Move the work if practicable to an area free of combustibles. Avoid working in paint spray rooms, dip tanks, storage areas, ventilators. If the work cannot be moved, move combustibles away from sparks and heat; or protect against ignition with suitable fire-resistant covers or shields. Walls, ceilings, and floor near work should be protected by heat resistant covers or shields. A Fire Watcher must be standing by with suitable fire extinguishing equipment during and for some time after welding or cutting if: 1. Appreciable combustibles (including building construction) are within 10m. 2. Appreciable combustibles are further than 10m, but can be ignited by sparks. 3. Openings (concealed or visible) in floors or walls can expose combustibles to sparks. 4. Combustibles adjacent to walls, ceilings, roofs or metal partitions can be ignited by radiant or conducted heat. After work, check that area is free of sparks, glowing embers and flames. An empty container that held combustibles or that can produce flammable or toxic vapours when heated, must never be welded on or cut, unless the container has first been cleaned. This includes a thorough steam or caustic cleaning (or a solvent or water washing, depending on the combustible’s solubility) followed by purging and inerting with nitrogen or carbon dioxide and using protective equipment. Water filling just below the working level may substitute for inerting. A container with unknown contents should be cleaned (see paragraph above). DO NOT depend on sense of smell or sight to determine if it is safe to weld or cut. Hollow castings or containers must be vented before welding as they can explode. In explosive atmospheres, NEVER weld or cut where the air may contain flammable dust, gas, or liquid vapours.
Parts & Service: 020 8988 7400 / E-mail: Parts@clarkeinternational.com or Service@clarkeinternational.com DO NOT overload arc welding equipment. It may overheat cables and cause a fire. Loose cable connections may overheat or flash and cause a fire. NEVER strike an arc on a cylinder or other pressure vessel. It creates a brittle area that can cause a violent rupture or lead to such a rupture later under rough handling. ELECTRIC ARC WELDING Comply with precautions in above and this section. Arc welding, properly done, is a safe process but a careless operator invites trouble. The equipment carries high currents at significant voltages. The arc is very bright and hot. Sparks fly, fumes rise, ultraviolet and infrared energy radiates and work pieces are hot. The wise operator avoids unnecessary risks and protects himself and others from accidents. BURN PROTECTION The welding arc is intense and visibly bright. It’s radiation can damage eyes, penetrate lightweight clothing, reflect from light coloured surfaces and burn the skin and eyes. Skin burns resemble acute sunburn, those from gas - shielded arcs are more severe and painful. PROTECTIVE CLOTHING (PPE) MUST BE WORN Wear long sleeved clothing (particularly for gas shielded arc) in addition to gloves, apron and strong shoes. As necessary, use additional protective clothing such as leather jacket or sleeves, flame-proof apron, and fire-resistant leggings. Avoid outer garments of untreated cotton. Bare skin protection: Wear dark substantial clothing, button collars closed to protect the chest and neck and button any pockets to prevent entry of sparks. EYE AND HEAD PROTECTION Protect eyes from exposure to arc. NEVER look at an electric arc without protection. ALWAYS use a welding helmet or shield containing an appropriate filter plate placed over the face before striking an arc. The filter plate must always be protected with a clear cover plate. A cracked or broken helmet or shield should NOT be worn as radiation can pass through to cause burns. Cracked, broken, or loose filter plates must be replaced IMMEDIATELY. Replace clear cover plate when broken, pitted, or spattered. We suggest you wear flash goggles with side shields under the helmet, to give some protection to the eyes should the helmet not be lowered over the face before an arc is struck. Looking at an arc momentarily with unprotected eyes (particularly high intensity gas-shielded arc) can cause a retinal burn that may leave a permanent dark area in the field of vision. Before welding whilst wearing contact lenses, seek advice from your optician. PROTECTION OF NEARBY PERSONNEL For production welding, a separate, well vented room or enclosed bay is best. In open areas, surround the operation with low reflective, non- combustible screens or panels. Allow for free air circulation, particularly at floor level. Provide face shields for all
Parts & Service: 020 8988 7400 / E-mail: Parts@clarkeinternational.com or Service@clarkeinternational.com persons who will be looking directly at the weld. Others working in the area should wear flash goggles. Before starting to weld, make sure that screen or bay doors are closed. SHOCK PREVENTION Exposed live conductors or other bare metal in the welding circuit, or in unearthed, electrically-LIVE equipment can fatally shock a person whose body becomes a conductor. DO NOT STAND, SIT, LIE, LEAN ON, OR TOUCH a wet surface when welding without suitable protection. PROTECTION FOR WEARERS OF ELECTRONIC LIFE SUPPORT DEVICES (PACEMAKERS) Magnetic fields from high currents can affect pacemaker operation. Persons wearing pacemakers should consult with their doctor before going near arc welding or spot welding operations. PROTECTION AGAINST SHOCK Keep your body and clothing dry. NEVER work in damp area without adequate insulation against electric shock. Stay on a dry duckboard or rubber mat when dampness or sweat can not be avoided. Sweat, sea water, or moisture between body and an electrically LIVE part - or earthed metal - reduces the body surface electrical resistance, enabling dangerous and possibly lethal currents to flow through the body. EARTHING THE EQUIPMENT When arc welding equipment is earthed according to the National Electrical Code and the workpiece is earthed, a voltage may exist between the electrode and any conducting object. Examples of conducting objects include, but are not limited to, buildings, electrical tools, work benches, welding power source cases, work-pieces, etc. NEVER touch the electrode and any metal object unless the welding power source is off. When installing, connect the frames of each unit such as welding power source, control, work table, and water circulator to the building earth. Conductors must be adequate to carry earth currents safely. Equipment made electrically live by stray current may shock, possibly fatally. DO NOT EARTH to electrical conduit or to a pipe carrying ANY gas or a flammable liquid such as oil or fuel. CABLES Frequently inspect cables for wear, cracks and damage. IMMEDIATELY REPLACE those with excessively worn or damaged insulation to avoid possibly lethal shock from bared cable. Keep cable dry, free of oil and grease and protected from hot metal and sparks. TERMINALS AND OTHER EXPOSED PARTS Terminals and other exposed parts of electrical units should have insulating covers secured before operation.
Parts & Service: 020 8988 7400 / E-mail: Parts@clarkeinternational.com or Service@clarkeinternational.com SAFETY DEVICES Safety devices such as interlocks and circuit breakers should not be disconnected or shunted out. Before installation, inspection, or service of equipment, shut off all power and remove line fuses (or lock or red-tag switches) to prevent accidental turning ON of power. DO NOT open power circuit or change polarity while welding. If, in an emergency, it must be disconnected, guard against shock burns or flash from switch arcing. Always shut OFF and disconnect all power to equipment. A power disconnect switch must be available near the welding power source. PREPARATION OF THE WORKING AREA The working area must be sufficiently spacious, with low humidity and good ventilation as to avoid any fumes which develop from the welding process and from incidental material adhering to the pieces to be welded (oils, paints, tars...) which may cause danger to the operator. Avoid welding any tanks which may contain flammable residuals. WARNING: ELECTRIC SHOCK CAN BE FATAL. A PERSON QUALIFIED IN FIRST AID SHOULD ALWAYS BE PRESENT IN THE WORKING AREA. IF PERSON IS UNCONSCIOUS AND ELECTRIC SHOCK IS SUSPECTED, DO NOT TOUCH THE PERSON IF HE OR SHE IS IN CONTACT WITH THE WELDER OR CABLES. DISCONNECT THE WELDER FROM THE POWER SOURCE AND THEN USE FIRST AID. DRY WOOD OR OTHER INSULATING MATERIAL CAN BE USED TO MOVE CABLES, IF NECESSARY, AWAY FROM THE PERSON.
Parts & Service: 020 8988 7400 / E-mail: Parts@clarkeinternational.com or Service@clarkeinternational.com ADDITIONAL PRECAUTIONS FOR MMA WELDING 1. ALWAYS ensure that there is full free air circulating around the outer casing of the machine and that the louvres are unobstructed. 2. A welding arc can seriously damage your eyes. Both operator and spectators must ALWAYS use a proper welding face shield or helmet with suitable filter lenses. Proper gloves and working clothes should be worn at all times. 3. ALWAYS remove all flammable materials from the welding area. 4. NEVER remove any of the panels unless the machine is disconnected from the supply and NEVER use the machine with any of the panels removed. 5. NEVER use or store in a damp environment. DO NOT EXPOSE TO RAIN. 6. NEVER attempt any electrical or mechanical repair unless your are a qualified technician. If you have a problem with the machine contact your local CLARKE dealer. 7. ALWAYS keep a fire extinguisher handy (Dry Powder, C02 or BCF, NOT water). 8. NEVER continue to weld, if, at any time, you feel even the smallest electric shock. Stop welding IMMEDIATELY and DO NOT attempt to use the machine until the fault is diagnosed and corrected. 9. NEVER allow the earth cable or torch to become wrapped around the operator or any person in the vicinity. A comprehensive range of CLARKE safety equipment for use when welding is available from your local dealer. See page 40. Consideration should be given to shielding the supply cable of permanently installed welding equipment, in metallic conduit or equivalent. Shielding should be electrically continuous throughout its length. The shielding should be connected to the welding power source so that good electrical contact is maintained between the conduit and the welding power source enclosure. The welding equipment should be routinely maintained according to the manufacturer’s recommendations (see page 37). All access and service doors and covers should be closed and properly fastened when the welding equipment is in operation. The welding equipment should not be modified in any way except for those changes and adjustments covered in the manufacturer’s instructions. In particular, the spark gaps of arc striking and stabilizing devices should be adjusted and maintained according to the manufacturers recommendations.
Parts & Service: 020 8988 7400 / E-mail: Parts@clarkeinternational.com or Service@clarkeinternational.com SAFETY SYMBOLS The following symbols may be displayed on the machine or its packaging. Read this instruction booklet carefully before use. Do not expose to rain. Wear welding mask Recycle unwanted materials under WEEE Directive Wear protective gloves General Hazard Wear a dust mask Warning;- Magnetic field created ( Caution:- Hot surface Danger! Harmful fumes Risk of Electric Shock Do not weld near flammable or combustible materials May interfere with pacemakers Danger:- Arc Rays
Parts & Service: 020 8988 7400 / E-mail: Parts@clarkeinternational.com or Service@clarkeinternational.com ELECTRICAL CONNECTION IMPORTANT: This product requires a 64A power supply which may make it unsuitable for some users. The welder MUST be connected to a 230 Volt/1 phase 50Hz supply through a suitably rated isolator switch. Before switching on, make sure that the voltage of your electricity supply is correct. Connecting it to any other power source may cause damage.. If the colours of the wires in the power cable of this product do not correspond with the markings on the terminals of your plug, proceed as follows.
- The Blue wire must be connected to the terminal which is marked N or Neutral.
- The Brown wire must be connected to the terminal which is marked L or Live.
- The Yellow wire must be connected to the terminal which is marked E or Earth. If in any doubt, consult a qualified electrician. DO NOT attempt any work yourself. WARNING! READ THESE ELECTRICAL SAFETY INSTRUCTIONS THOROUGHLY BEFORE CONNECTING THE PRODUCT TO A POWER SUPPLY. THE INSTALLATION OF THIS APPLIANCE SHOULD BE CARRIED OUT BY A COMPETENT ELECTRICIAN AND BE IN ACCORDANCE WITH CURRENT IEE WIRING REGULATIONS (BS4343). WARNING: THE WIRES IN THE POWER CABLE OF THIS PRODUCT ARE COLOURED IN ACCORDANCE WITH THE FOLLOWING CODE: BLUE = NEUTRAL BROWN = LIVE YELLOW = EARTH
Parts & Service: 020 8988 7400 / E-mail: Parts@clarkeinternational.com or Service@clarkeinternational.com OVERVIEW OF MACHINE FEATURES THE CONTROL FUNCTIONS The MIG250 Multi-welder is fitted with the following features: 1) TORCH CONNECTION (2) ARC CONTROL This knob controls the output characteristics of the arc. Rotating clockwise, the arc is soft, with deeper penetration and smaller splatter but with weak stability. Rotating anticlockwise, the arc is harder, with better stability, but penetration depth becomes shallower and the splatter increases. The adjustment range is ”-5 to +5”, and the default position is at 0. (3) CRATER VOLTAGE/ARC FORCE CURRENT In MIG/MAG, this knob controls the crater voltage. In MMA, with no remote controller, this knob controls the arc force current. (4) CRATER CURRENT In MIG/MAG mode, this knob controls crater current. In MMA mode, this knob controls the welding current.
Parts & Service: 020 8988 7400 / E-mail: Parts@clarkeinternational.com or Service@clarkeinternational.com (5) CURRENT DISPLAY The pre-set current is displayed during standby and the actual current is displayed during welding. (6) VOLTAGE DISPLAY The pre-set voltage is displayed during standby and the actual voltage is displayed during welding. (7) INDIVIDUAL / SYNERGIC Individual and synergic modes are available. When Individual, the current and voltage settings will be separated. When Synergic, the voltage setting is linked to the current setting. Firstly, set the voltage knob to the center position, then adjust the current knob and the voltage will automatically match with the current adjustment. If you need to adjust the voltage, you can adjust it before and after the center position. At this time, the voltage will increase or decrease based on the default value. (8) OPERATION METHOD SELECTION 2T and 4T codes are available.
- 2T: Start welding by pressing the torch switch. (Suitable for a short weld bead).
- 4T: Press the torch switch to start the arc. The switch can be released and the welding is performed normally. When the torch switch is pressed again, it is transferred to the crater welding specification set by the front panel knob and the welding will be stopped when the switch is released. (Suitable for long welding bead).
- S4T: - Default setting of the arcing current and pre-gas support for aluminum welding. (9) WIRE DIAMETER SELECTION Choose the 0.8,1.0, or 1.2 according to the welding wire diameter. (10) WELDING MODE SELECTION MIG, MAG and MMA modes are optional. (11) OUTPUT TERMINAL OF THE WELDING POWER SOURCE "-" (12) WELDING GUN POLARITY CONVERSION JOINT (13) WELDING SOURCE OUTPUT “+ ” (14) ON/OFF ISOLATOR SWITCH This switch will automatically cut off the power when the power source is overloaded or malfunctions to protect the user’s personal safety and important parts of the machine.
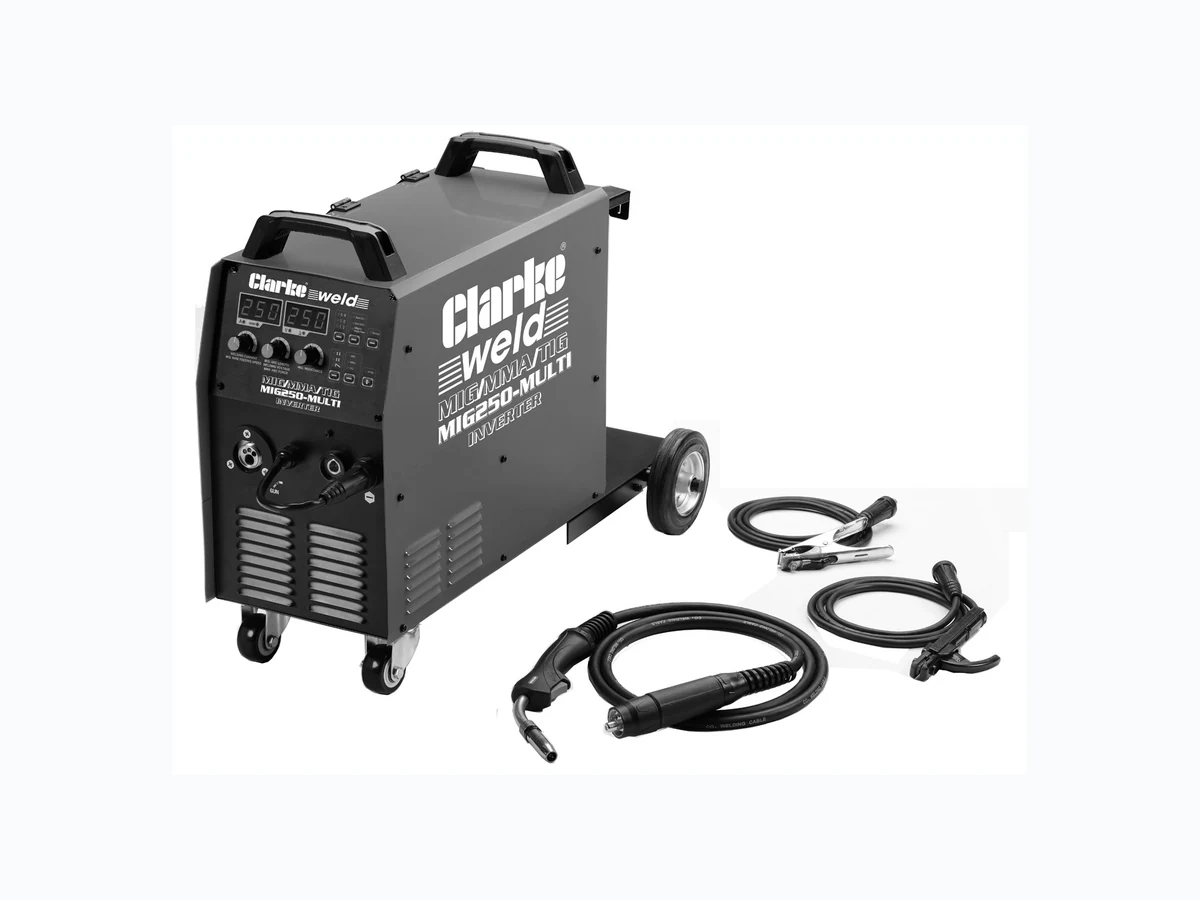
Parts & Service: 020 8988 7400 / E-mail: Parts@clarkeinternational.com or Service@clarkeinternational.com In general, this switch is pulled up to the ON position. Starting and stopping the power source should use the power switch on the switch board. DO NOT use this switch as a power switch. (15) CABLE CLAMP (16) GAS SUPPLY CONNECTOR (17) COOLING FAN LOOSE ITEMS SUPPLIED The following items are supplied loose with the machine. When unpacking, any damage or deficiency should be reported to your CLARKE dealer immediately.
- 1 x MB 25AK welding torch with hose (0.8mm tip fitted)
- 1 x Electrode holder/lead
- 1 x Earth cable/clamp
- 1 x Set U rollers U1.0/1.2mm (Alu welding)
- 2 x Hose clips
- 1 x 2M Gas hose
- 1 x 1.0mm welding torch tip
- 1 x 1.2mm welding torch tip
- 1 x 1.0mm welding torch tip (aluminium wire)
- 1 x 1.2mm welding torch tip (aluminium wire)
- 1 x PTFE liner
- 1 x Gas cylinder retaining strap
- 2 x Castor wheels with fittings
- 2 x Wheels with fittings
- 1 x Base for gas bottle inc axle for wheels (A TIG torch kit is not supplied with the machine. These are however, is readily available from your CLARKE dealer (Part number 6012232/6012239).
Parts & Service: 020 8988 7400 / E-mail: Parts@clarkeinternational.com or Service@clarkeinternational.com BEFORE STARTING WORK WORKING SPACE The welder should be used indoors away from direct sunlight, rain, low humidity or airborne dust. Ideally, the surrounding air temperature should be in the range of 10 to 40 degrees C. Welding should be done in a windless place (use of a wind shield, etc. if necessary). Make sure that there is at least 20cm of space around the welder to ensure good air cooling. ALWAYS position the machine on level ground. Welding gloves and safety shoes are needed when welding, together with a suitable welding helmet. INPUT POWER REQUIREMENT
- The welder requires a fused 64A power supply. CONNECTION OF ATTACHMENTS Cables and gas supply must be connected as shown. A wide selection of accessories and consumables are available from your CLARKE dealer (see page 40).
Parts & Service: 020 8988 7400 / E-mail: Parts@clarkeinternational.com or Service@clarkeinternational.com PREPARING THE MACHINE FOR USE FITTING THE GAS BOTTLE HOLDER AND WHEELS 1. Fit both wheels to the baseplate and secure with the cotter pins supplied. 2. Attach the baseplate/gas bottle support to the underside of the machine using the four bolts supplied. 3. Using the bolts supplied, secure the two front castors to the underside of the machine. 4. Mount the gas cylinder retaining bracket to the end of the machine with the securing bolt. 5. Mount the gas cylinder to the rear of the machine, securing with the retaining strap. Install the pressure relief valve to the gas cylinder and ensure it is tight to prevent leakage.
Parts & Service: 020 8988 7400 / E-mail: Parts@clarkeinternational.com or Service@clarkeinternational.com CONNECTING THE GAS CYLINDER The welder can be configured to weld, with or without a gas supply according to the type of welding wire being used.
- Mild steel solid core (with gas)
- Flux cored (no gas) 1. Connect a gas cylinder to the connector at the back of the welder using the gas hose and hose clips supplied. MOUNTING THE WELDING WIRE SPOOL Select the appropriate wire diameter (0.8, 1.0 or 1.2) according to the welding process anticipated. After the wire diameter is selected, check that the wire diameter matches the size of the wire feeding roller and the welding torch components. Spools of welding wire are available from your CLARKE dealer. 1. Open the side panel and remove the locking nut.
- The retaining locknut nut has a left- hand thread. 2. Place a spool of welding wire over the spindle.
- DO NOT release the tension on the wire as it will unravel, causing feeding problems later.
- The wire will feed off the spool anticlockwise from the bottom of the reel.
- The spool must be fitted in the correct orientation otherwise it will not feed correctly. 3. Replace the retaining locknut to secure the spool. WARNING: MAKE SURE THAT THE WELDER IS NOT CONNECTED TO THE MAINS SUPPLY.
Parts & Service: 020 8988 7400 / E-mail: Parts@clarkeinternational.com or Service@clarkeinternational.com SETTING THE DRIVE ROLLER SIZE 1. Release the tensioning lever to the left and hinge up the tension arm. 2. Unscrew the knurled knob and remove it in order to pull off the guide roller.
- The groove size is stamped on the corresponding side of the roller. 3. Select the groove size according to the size of the wire you will be using. 4. Replace the chosen roller onto the spindle. Secure with the knurled knob and re- tension the locking handle. THREADING THE WIRE IMPORTANT: Do not release the tension on the wire spool as it will unravel causing feeding problems later. 1. Pull out the end of the wire from the spool, taking care not to release the tension.
- We recommend you cut off and discard the first 10 cm of wire from the spool to avoid any burrs and then straighten the next few centimetres of wire to help with feeding. 2. Loosen the tensioning lever and lift up the roller tensioning arm. 3. Feed the wire through the guides, over the drive roller and into the torch liner.
- Guide about 10-15 cm into the torch liner. 4. Lower and reset the tensioning lever and arm.
- Tighten the tensioner sufficiently to hold in position but do not fully tighten. NOTE: Correct tension will allow the wire to feed into the torch liner smoothly but will allow the drive roller to slip in the event of a blockage. 5. Adjust the tensioning levers so that the pressing force is appropriate, the welding wire is normally feeding and there is no slip on the wire feed rollers.
Parts & Service: 020 8988 7400 / E-mail: Parts@clarkeinternational.com or Service@clarkeinternational.com The wire spool support axle is equipped with a damping adjustment mechanism with an adjustment bolt at its centre. THE MACHINE CONTROL MENU RECOMMENDED PRESSURES Wire Dia Recommended Pressure 1.2 4 - 5 1.0 3 - 4 0.8 2 - 3 Code Functions Details Description Default setting F00 Standard/Fast Feeding mode select ON/OFF OFF-standard On-Fast Feeding OFF F01 Burn back (s) 5.0~5.0 Burn back time setting 0.0 F02 Slow feeding (m/min) 5.0~5.0 Only control it under F00- OFF 0.0 F03 Pre-gas (s) 0.01-2.00s Post gas time setting 0.10 F04 Post gas (s) 0.01-2.00s Post gas time setting 0.50 F05 Start arcing (%) 0-200 Only control it under F00- OFF 125 Start arc length -5.0~5.0 Under hidden menu and press “Synergic” control 0.0 F06 Extinguishing arc (%) 0-200 Only control it under F00- OFF Extinguishing arc -5.0~5.0 Under hidden menu and press “Synergic” control 0.0 F07 Transition time (s) 0.1-9.9 Only control it under F00- OFF 0.5 F17 Start arcing time OFF-0.1-9.9 Only control it under F00- OFF and 2-step OFF F18 Arc extinguishing time OFF-0.1-9.9 Only control it under F00- OFF and 2-step OFF
Parts & Service: 020 8988 7400 / E-mail: Parts@clarkeinternational.com or Service@clarkeinternational.com CONFIGURING THE MACHINE CONNECTIONS To prepare the machine for welding it is important that you follow the following procedure. Making sure that the ON/OFF switch on the rear panel is in the OFF position, connect the welding leads and gas bottle as follows and set the control panel selections as follows. Synergic control in a MIG welding machine refers to a machine that automatically sets the welding parameters, according to the wire type and diameter and shielding gas. This is achieved by selecting either the amperage, wire feed speed or plate thickness required, with a single knob. The built-in database with synergic mode makes the welding easier. CONNECTION AND OPERATION FOR MMA There are two possible connection modes: Positive and Negative. (A) Positive connection 1. Connect the workpiece to “+” electrode holder to “-”. This configuration is often used when welding acid electrodes, giving high deposition rate and shallow penetration. (B) Negative connection 1. Connect the work piece to “-” and the electrode holder to “+”. This connection is often used for alkaline electrodes. The weld penetration is deep. and good for arc stability when using this negative connection welding alkaline electrodes. 2. Set the power ON. 3. Choose ”MMA” on the front panel. MMA welding is possible only after the output is connected to the welding cable. CONNECTION AND OPERATION FOR MIG/MAG Connect the attachments as shown in the diagram on page 17. 1. Connect the power supply. 2. Connect the torch to the “+” socket on the front panel. 3. Connect the earth cable to the ”-” socket on the front panel and ensure a reliable connection between the earth cable and the workpiece. 4. Fit the gas regulator to the gas cylinder and tighten securely.
Parts & Service: 020 8988 7400 / E-mail: Parts@clarkeinternational.com or Service@clarkeinternational.com 5. Insert the two-pin plug of the gas regulator into the heating socket on the rear panel. 6. Connect the gas tube to the gas regulator air outlet and secure with the hose clamp supplied. 7. When in MAG mode a mixed gas suitable for MAG welding can be used. If mixing two bottles of gas, a gas mixing valve must be used to deliver an even mixture. WELDING WIRE/ROD The following sizes can be used and are available from your CLARKE dealer. Attach the earth clamp to the workpiece as close as possible to the area being welded. Clean with a wire brush where necessary to ensure the connection is as clean as possible. PREPARING THE WORKPIECE The area being welded should be perfectly clean. Any coating, plating or corrosion must be removed, otherwise a good weld will be impossible to achieve. ROD DIAME- TER WORKPIECE THICK- NESS Part Nos MIG wire 0.6 mm wire 1-12 mm 8132100 0.8 mm wire 8132070 0.9 mm wire 8132110 MMA rod 1.6 mm rod 1.0 - 15 mm 3050590 2.5 mm rod 3050594 3.2 mm rod 3050596 TIG electrode 1.6mm rod 1.0 - 5.0mm 3050630 2.4mm rod 3050635
Parts & Service: 020 8988 7400 / E-mail: Parts@clarkeinternational.com or Service@clarkeinternational.com OPERATING THE WELDER (MIG) 1. With the welding current set and the wire trimmed, set the wire feed control to an intermediate setting. 2. Plug the machine into the power supply and switch on. 3. Cover your face with the welding mask supplied. 4. Approach the work with the torch tip at an angle of about 45o and pull the torch trigger fully.
- As the wire touches the workpiece an arc will be struck. 5. In order to produce a satisfactory weld, the control may be fine tuned as required. This will come with practice.
- MIG welding is an acquired skill. It is strongly advised that, if you are not fully familiar with this type of welding, you practice on a piece of material with the same characteristics as your workpiece until you are satisfied with the result and you have set your welder to produce a satisfactory weld.
- One of the problems experienced with novice welders is the welding wire sticking to the contact tip. This is as a result of the wire feed speed being too slow. It is always better therefore to start with too high a speed and back off slightly to avoid the possibility of the wire welding itself to the tip.
- The speed of wire delivery will increase automatically as the current is increased.
- Listen to the sound made. An irregular crackling sound denotes too high a wire speed. Decrease the voltage/speed until a regular, strong buzzing sound is heard. WELDING TECHNIQUE
- Try to maintain the tip of the nozzle at an angle of approx 45oand at a constant distance of approx 5-7mm from the workpiece.
- Try to maintain a constant speed of movement with the torch. WARNING: WHEN WELDING ALWAYS ENSURE THERE IS ADEQUATE VENTILATION IN THE WORK AREA DUE TO TOXIC FUMES. WARNING: DO NOT STRIKE THE ELECTRODE ON THE WORKPIECE, AS THIS MAY DAMAGE THE ELECTRODE. WARNING: WELDING ARCS PRODUCE HARMFUL UV/IR LIGHT WHICH CAN SERIOUSLY DAMAGE YOUR EYES. ALWAYS USE A WELDING FACE-SHIELD WITH A SUITABLE FILTER THAT CONFORMS TO CURRENT STANDARDS. WARNING: PROTECT BYSTANDERS BY USING WELDING SCREENS.
Parts & Service: 020 8988 7400 / E-mail: Parts@clarkeinternational.com or Service@clarkeinternational.com
- DO NOT weld in windy conditions or in an area where ventilation is a problem, or where air flow fluctuates.
- ALWAYS keep the wire and nozzle clean...NEVER use rusted wire.
- Avoid sharp bends or kinks in the welding hose.
Parts & Service: 020 8988 7400 / E-mail: Parts@clarkeinternational.com or Service@clarkeinternational.com OPERATING THE WELDER (MMA/ARC) The consumable electrode is connected to a high amperage low voltage supply which creates an electric arc between the electrode and the workpiece. The most difficult aspect of the arc welding process, particularly for beginners, is that of striking an arc. We strongly recommend that you practice on some pieces of scrap metal to get the feel of the operation before you start an actual welding job. 1. Holding the welding mask close-up to your face, give a short stroke with the electrode on the workpiece. As soon as the arc is primed, withdraw the electrode from the workpiece to leave a gap. The current will flow across the gap with a crackling noise and a brilliant arc. Continue to weld in one direction, maintaining the small gap as you go. 2. As soon as the arc is struck, maintain a distance from the workpiece equal to the diameter of the electrode. Keep this distance as constant as possible for the duration of the weld. As you advance along the workpiece the angle of the electrode must be maintained at between 20º and 30º. NOTE: When you prime the arc be sure to withdraw the electrode swiftly to leave the gap, otherwise the electrode will weld itself to the workpiece. If this occurs give the electrode a short sharp jerk to free it and, if necessary, prime the arc again. If you cannot free the electrode, switch the machine off immediately and free it. Take care the electrode will get red hot very quickly and will be capable of burning through welding gloves. 3. At the finish of the weld, bring the end of the electrode backward in order to fill the weld crater and then quickly lift the electrode from the weld pool to extinguish the arc. 4. Inspect the job carefully. Any slag forming on the surface should be chipped away with a chipping hammer or pick. ALWAYS wear your safety goggles when chipping away slag. WARNING: WHEN WELDING ALWAYS ENSURE THERE IS ADEQUATE VENTILATION IN THE WORK AREA DUE TO TOXIC FUMES. WARNING: DO NOT STRIKE THE ELECTRODE ON THE WORKPIECE, AS THIS MAY DAMAGE THE ELECTRODE. WARNING: WELDING ARCS PRODUCE HARMFUL UV/IR LIGHT WHICH CAN SERIOUSLY DAMAGE YOUR EYES. ALWAYS USE A WELDING FACE-SHIELD WITH A SUITABLE FILTER THAT CONFORMS TO CURRENT STANDARDS. WARNING: PROTECT BYSTANDERS BY USING WELDING SCREENS.
Parts & Service: 020 8988 7400 / E-mail: Parts@clarkeinternational.com or Service@clarkeinternational.com OPERATING THE WELDER (TIG WELDING) TIG welding is primarily for very thin materials. It uses a non-consumable tungsten (or tungsten alloy) electrode held in a torch. A shielding gas (100% Argon), is fed through the torch to protect:
- The electrode
- Molten weld pool
- Solidifying weld metal from contamination by the atmosphere The electric arc is produced by the passage of current through the conductive, ionized shielding gas. The arc is established between the tip of the electrode and the work. Heat generated by the arc melts the base metal. Once the arc and weld pool are established, the torch is moved along the joint and the arc progressively melts the joined surfaces. Filler wire, if used, is usually added to the leading edge of the weld pool to fill the joint. This process is ideally suited for welding thin metals such as car body panels, pressure vessels, heat exchangers, pipes etc., where accuracy and a high quality weld is desired, as it produces a very low porosity weld. MAIN FEATURES OF TIG WELDING 1. Electronic control of welding current. 2. Forced air cooling. 3. A thermal overload protection device prevents overheating. TIG WELDING PROCESS ADVANTAGES
- It produces superior quality welds, generally free of defects.
- It is free of the spatter which occurs with other arc welding processes.
- It can be used with or without filler metal as required.
- It allows excellent control of root pass weld penetration.
- It can produce welds at high speeds.
- It allows precise control of the welding variables.
- It is capable of welding very thin material (1mm), without undue distortion. LIMITATIONS 1. Greater weld dexterity is required. 2. The DC output is not suitable for welding aluminium.
Parts & Service: 020 8988 7400 / E-mail: Parts@clarkeinternational.com or Service@clarkeinternational.com TIG WELDING Before TIG welding, you must obtain the correct torch and a gas cylinder of 100% pure Argon from your CLARKE dealer. To prepare the machine for TIG welding, adopt the following procedure.
- For good contact, the work clamp must be attached to clean bare metal. Clean with a wire brush where necessary. 3. Turn the pressure regulator knob to set a pressure of approx. 2.5kg/cm2 (35 lbf/ in2). 4. Ensure the electrode at the torch nozzle, protrudes by 4 - 5mm and ensure that the electrode is sharply pointed with an angle of 40o-60o if it is not, grind it to shape. 5. Set the welding current in accordance with the thickness of the material to be welded and the size of tungsten electrode to be used. 6. Cover your face with the head shield, bring the torch to within 3-4mm of the work, and at an angle of 40-60o, so that the ceramic nozzle gently touches the work surface. 7. Scratch the tip of the electrode against the piece to be welded, as soon as the welding arc starts, remove the electrode to a distance of 3-4 mm, and continue the weld. (See notes below).
- This method is referred to as ‘Scratch Arc’. 8. Turn off the gas as soon as you finish welding. Notes:
- To avoid a visible strike mark on the surface of the workpiece it is advisable to strike the arc in the joint where the mark will be concealed by the weld.
- Thin sheet and stainless steel may be welded with or without filler, similar to gas welding.
- The filler is fed in at the edge of the pool. The rod must not touch the tip of the electrode or enter the arc. The end of the rod must always be shielded
Parts & Service: 020 8988 7400 / E-mail: Parts@clarkeinternational.com or Service@clarkeinternational.com by the argon atmosphere to prevent as far as possible the formation of oxides of its surface. When welding stainless steel and copper, it is often possible to feed in the filler continuously at the edge of the pool.
- The arc length generally varies between 3 and 6 mm depending on the type of joint, type and thickness of material and so on.
- The torch is advanced in the direction of welding without lateral movement, maintaining the torch angle of 45o to the workpiece. CAUTION: THE DUTY CYCLE MUST BE ADHERED TO IN ORDER TO PREVENT THE THERMAL OVERLOAD PROTECTION FROM ACTIVATING
Parts & Service: 020 8988 7400 / E-mail: Parts@clarkeinternational.com or Service@clarkeinternational.com WELDING SETTINGS TABLES L-SHAPED BUTT WELDING FLAT ANGLE T-SHAPED WELDING Metal thickness (mm) Wire diameter (mm) Root gap G (mm) Welding current (A) Welding voltage (V) Welding speed (cm/ min) Gas Flow (L/min) 0.8 0.8 - 0.9 0 60-70 16-16.5 50-60 10 1.0 0.8 - 0.9 0 75-85 17-17.5 50-60 10-15 1.2 0.8 - 0.9 0 80-90 17-18 50-60 10-15 1.6 0.8 - 0.9 0 95-105 18-19 45-50 10-15 6.0 1.2 1.2 - 1.5 170-185 24-26 40-50 15-20 9.0 1.2 1.2 - 1.5 320-340 32-34 40-50 15-20 Metal thickness (mm) Wire diameter (mm) Welding current (A) Welding voltage (V) Welding speed (cm/ min) Gas Flow (L/min) 1.0 0.8 - 0.9 70-80 17-18 50-60 10-15 1.2 0.9-1.0 85-90 18-19 50-60 10-15 1.6 1.0-1.2 100-110 18-19.5 50-60 10-15 2.0 1.0-1.2 115-125 19.5-20 50-60 10-15 2.3 1.0-1.2 130-140 19.5-21 50-60 10-15 3.2 1.0-1.2 150-170 21-22 45-50 15-20 4.5 1.0 - 1.2 180-200 23-24 40-45 15-20 6 1.2 230-260 25-27 40-45 15-20 8.9 1.2-1.6 270-380 29-35 40-45 20-25 12 1.2-1.6 300-380 32-35 35-40 20-25
Parts & Service: 020 8988 7400 / E-mail: Parts@clarkeinternational.com or Service@clarkeinternational.com ANGLE JOINT (THIN PLATE) FLAT FILLET WELDING LAP JOINT (THIN PLATE) Metal thickness (mm) Wire diameter (mm) Welding current (A) Welding voltage (V) Welding speed (cm/ min) Gas Flow (L/min) 0.2 1.2 0.8-0.9 0.8-0.9 60-70 80-90 16-17 18-19 10 10-15 1.2 1.6 0.8-0.9 0.8-0.9 80 - 90 90-100 18-19 19-20 10 10-15 1.6 0.8-0.9 90-100 19-20 10 10-15 2.3 0.8-0.9 100-130 20-22 10 10-15 2.3 1.0-1.2 120-150 21-23 10 10-15 3.2 1.0-1.2 150-180 23-24 10-15 10-15 4.5 1.2 200-250 25-28 10-15 10-15 Metal thickness (mm) Wire diameter (mm) Welding current (A) Welding voltage (V) Welding speed (cm/ min) Gas Flow (L/min) 1.6 0.8 - 0.9 65-75 16-17 10 10-15 2.3 0.8 - 0.9 80-100 19-20 10 10-15 3.2 1.0-1.2 130-150 20-22 10-15 10-15 4.5 1.0-1.2 150-180 21-23 10-15 10-15
Parts & Service: 020 8988 7400 / E-mail: Parts@clarkeinternational.com or Service@clarkeinternational.com WELDING PITFALLS The arc welding technique is an acquired skill and requires considerable practice before perfect results are obtained. The diagrams below will help to explain the pitfalls in your technique and how to overcome them. ARC TOO SHORT This causes irregular masses of weld to be deposited, with slag contamination on an uneven surface. ARC TOO LONG This causes poor penetration resulting in a weak weld with excessive spatter and porosity. Surface of the weld is rough and the arc makes a hissing sound ELECTRODE MOVED TOO SLOWLY This causes a very wide and heavy deposit which overlaps at the sides. It is wasteful both in terms of time and electrode use. ELECTRODE MOVED TOO QUICKLY This causes poor penetration with a ‘stringy’ and incomplete weld deposit. Slag is very hard to remove. CURRENT TOO LOW This causes poor penetration and causes the electrode to stick to the workpiece too readily. Also results in a very irregular and high weld deposit. Slag is very hard to remove. CURRENT TOO HIGH This causes excessive penetration with spatter and deep pointed crater. It may also cause holes to be burned in the workpiece. Burns electrodes very quickly. THE PERFECT WELD With the correct combination of arc length, current regulation, inclination and speed of the electrode, you will, with practice, produce the perfect weld. This should be regular with uniform ripples and no slag contamination. The arc will make a steady crackling sound.
Parts & Service: 020 8988 7400 / E-mail: Parts@clarkeinternational.com or Service@clarkeinternational.com MACHINE ERROR CODES The machine error codes are displayed on the panel. Error Fault Cause Remedy E05 Input over voltage Input voltage too high Check the voltage and correct E06 Input under voltage Input voltage too low Check the voltage and correct. E15 Startup abnormal 1) Torch switch is on when power is on. 2) No no-load voltage 3) Current output 1) Check the torch switch 2) Replace the control board 3) Replace driver board. E17 Output over current 1) Over current 2) Current sensor failure 3) Signal wire broken 4) Control board broken 1) Repair the output cable 2) Repair the signal wire 3) Replace the current sensor 4) Replace the control board E19 Overheat protection 1) Internal over- heating (exceeding rated duty cycle /front or rear vents blocked. 2) Temperature relay failure. 3) Signal wire failure 4) Control board failure 1) Check the fan and await cooling inside the power source. 2) Check connection of the temperature relay. 3) Replace control board 4) Replace temperature relay. E40 Display cannot receive signal from control board 1) Communication harness loose/ broken. 2) Control board failure. 3) Display board failure. 1) Check communication harness 2) Replace control board 3) Replace display board E41 Control board cannot receive signal from display board 1) Communication harness loose/ broken. 2) Control board failure. 3) Display board failure. 1) Check communication harness 2) Replace control board 3) Replace display board
Parts & Service: 020 8988 7400 / E-mail: Parts@clarkeinternational.com or Service@clarkeinternational.com TROUBLESHOOTING Your welder has been designed to give long and trouble free service. If however, having followed the instructions in this booklet carefully you still encounter problems, the following points should help identify and resolve them. For many defects listed the unit is best returned to your. CLARKE dealer . DEFECT CAUSES SUGGESTIONS No power indication when power connected No power supply. Air switch on rear panel damaged. Transformer damaged. Control board damaged. Indicator defective. Check power is available. Replace switch. Replace transformer or control board. Replace indicator. Air swich turns off immediately when power on. Failed air switch. IGBT module damaged. Rectifier bridge damaged. Power control board defect Replace air switch. Replace IGBT module and check the rectifier diode and control board. Replace rectifier bridge. Replace control board Air switch automatically powers off when welding Long term overload. Air switch is damaged. Operate according to the antic- ipated load rate. Replace air switch. Welding current cannot be adjusted. Control cable of wire feeder break or controller damaged. Control board broken Current sensor is broken. Replace wire feeder break or controller Replace Control board Replace Current sensor CO2 regulator fails to heat CO2 regulator damaged Heater cable damaged or short circuited. Heater fuse broken Replace CO2 regulator Replace heater cable Replace heater fuse Spark will not start Bad clamp connection. Inverter PCB defective. Check clamp connection. Contact your nearest CLARKE dealer. No output voltage Overheated machine Wait for thermal cutout to be reset. Inverter PCB defective. Contact your nearest CLARKE dealer.
Parts & Service: 020 8988 7400 / E-mail: Parts@clarkeinternational.com or Service@clarkeinternational.com Wrong output current Current selector control is defective. Contact your nearest CLARKE dealer. Low power supply voltage. Check the mains distribution system. Welder does not feed wire. Feed motor defective. Return welder to your CLARKE- dealer. Feed motor running but no wire being fed from welder tip Insufficient feed roller pressure. Increase roller pressure. Burr on end of wire. Re-cut wire square with no burr. Liner blocked or damaged. Clean with compressed air or replace liner. Inferior wire Use only good “clean” wire. Roller worn out. Replace roller. Loose coils of wire tangle around wire drum inside machine. Wire liner damaged preventing smooth operation. Renew wire liner. Locking knob too slack. Tighten Locking Knob slightly. Do not over-tighten. Erratic wire feed. Tensioning knob too tight. Tension roller worn. Insufficient pressure on tension roller. Wire dirty, rusty, damp or bent. Re-cut wire and ensure it is clean. Loosen tensioning knob slightly. Check and replace if necessary. Increase pressure on tension roller. Do not over-tighten. Porosity of welds Acid electrode on steel with high sulphur content. Workpieces are too far apart. Use basic electrode. Move edges to be welded closer together. Move slowly at the beginning. Cracks in weld Material being welded is dirty (e.g.oil, paint, rust, oxides, moisture). Incorrect current/voltage. Penetration too deep with too much carbon Clean workpiece before welding is an essential method of achieving neat weld beads. Also increase cur- rent output. DEFECT CAUSES SUGGESTIONS
Parts & Service: 020 8988 7400 / E-mail: Parts@clarkeinternational.com or Service@clarkeinternational.com Poor penetration Low welding current, high welding rate, Poor electrode inclination angle or too far from workpiece. Ensure operating parameters are regulated and improve preparation of work pieces. Profile defects Welding parameters are incorrect. Pass rate is not related to operating parameter requirements. Electrode not inclined constantly while welding. Follow basic and general welding principles. High splatter Electrode is too inclined. Contaminated wire or work- piece. Poorly matched current or volt- age. Make appropriate corrections. Arc is unstable Insufficient current. Contact tip severely worn Check condition of electrode and earth wire connection. Slag present in weld Insufficient current. Arc of tip movement too large. Adjust current. Adjust swing angle. Electrode melts obliquely Electrode core is not centred. Magnetic blow phenomenon. Replace electrode. Connect two earth wires to opposite sites of the work piece. Poor quality welds. Insufficient gas at weld area. Check that gas is not being blown away by draughts and if so move to a more sheltered work area. If not, increase gas supply. Rusty, painted, damp, oil or greasy workpiece. Ensure workpiece is clean and dry. Rusty/dirty wire. Ensure wire is clean and dry. Poor earth contact. Check earth clamp/workpiece connection. Welder cuts out whilst in use. Duty cycle exceeded (auto cut- out operates). Allow welder to cool 15-30 mins before continuing. DEFECT CAUSES SUGGESTIONS
Parts & Service: 020 8988 7400 / E-mail: Parts@clarkeinternational.com or Service@clarkeinternational.com CARE AND MAINTENANCE The machine requires no maintenance other than the following guidelines. Cleaning at frequent intervals is advisable if the unit is operating in a very dusty environment. Avoid getting particles of metal inside the machine since they could cause short circuits and be alert to any unusual noises or smells. 1. Keep the louvres clean to avoid a build up of dirt inside the machine which can reduce machine output or become a hazard. 2. Check all cables periodically for good condition and security. 3. Inspect the earth cable and torch hose before use, to ensure they are in perfect condition and that the earth clamp is clean and secured correctly to the cable. 4. Check the hose for security and damage. Wire feed unit: The feed roller / wire guide plays an important part in achieving consistent results. Periodically check the contact surfaces including the feed roller groove, removing any deposits. and checking the smoothness of rotation. Note that poor wire feeding can cause the welding arc to be unstable. Check that the centre of the feed tube and the centre of the wire feed wheel groove line up exactly. Torch: Protect the torch hose assembly from mechanical wear. If the liner is blocked or damaged it must be replaced. Contact tip: The contact tip is a consumable item and must be replaced when the bore becomes enlarged or oval. The contact tip must be kept free from spatter to ensure an unimpeded flow of gas. To keep the contact tip free from spatter, we recommend the use of anti-spatter spray (6000715) available from your CLARKE dealer. Torch shroud: The torch shroud must also be kept clean and free from spatter. Build-up of spatter inside the gas cup can cause a short circuit at the contact tip which will result in expensive machine repairs. WARNING: ELECTRICITY CAN KILL - NEVER TOUCH LIVE ELECTRICAL COMPONENTS. WARNING: DISCONNECT THE POWER SUPPLY BEFORE ALL INSPECTIONS AND MAINTENANCE ACTIVITIES. BEWARE HOT SURFACES.
Parts & Service: 020 8988 7400 / E-mail: Parts@clarkeinternational.com or Service@clarkeinternational.com COMPONENT PARTS
1 Quick connector socket 11 Rack Capacitor PCB 21 Hinge
2 Cable gland 12 Wire feed motor 22 Top cover
3 Potentiometer knob 13 Main control board 23 Cylinder bracket
4 Panel support plate 14 Capacitor board 24 Rotary power switch
5 Control panel overlay 15 Insulation strip/guide 25 Cable gland
6 Panel protective cover 16 Wire spool holder 26 Rear panel
7 Front panel 17 Wire feed door 27 Solenoid valve
8 Right support bar 18 Door latch 28 Cooling fan
9 Left support bar 19 Left side panel 29 Centre partition
10 Centre panel 20 Handle 30 Fan bracket
31 Base plate 37 Radiator 2 43 Main Transformer
32 Rear wheel 38 Diode plate unit 44 Rectifier bridge
Parts & Service: 020 8988 7400 / E-mail: Parts@clarkeinternational.com or Service@clarkeinternational.com TORCH COMPONENTS
33 Axle 39 Insulation sheet 45 Thermal overload
34 Cylinder support tray 40 Internal baffle 46 Castor wheel
35 Base panel 41 Insulation sheet
36 Radiator 1 42 Reactance
1 Sheath 7 Protective spring
2 Contact tip 8 Cable
3 Diffuser 9 Screw holder
4 Swan neck 10 Screw
5 Hand shank 11 EU connector
6 Trigger
Parts & Service: 020 8988 7400 / E-mail: Parts@clarkeinternational.com or Service@clarkeinternational.com CONSUMABLES The following are some of the accessories available from your CLARKE dealer. Please quote the part numbers shown below: A Gas Regulator, Arc Activated Headshields, Anti-spatter Spray, Swan Necks, Torch Shrouds and Torch Liner are also available from your CLARKE dealer or our parts division. Part Description Part number Comment Welding Wire Spools Flux cored mild steel (mini spool) 0.9mm
8132110 Use for no gas welding
Mild steel (mini) - 0.8mm 8132070 Use for gas welding Stainless Steel 0.8mm (mini spool) 8132090 Welding Gas CO2 (250g) 6000642 For welding mild steel CO2 (600g) 6000643 For welding mild steel Argon 6000661 For aluminium/stainless CO2/Argon Mix 6000660 For welding stainless/ thin sheet mild steel Welding Tips 0.8 mm (pack of 5) 8132270 1.0 mm (pack of 5) 8132275 Arc Welding Rods 1.6 x 300mm 3050590 2.0 x 350mm 3050592 2.5 x 350mm 3050594 3.25 x 350mm 3050596 Welding Rods 4.0 x 400mm E6013 3050598 Welding Torch Welding Torch Assembly (MMA/TIG) 6012232 Regulator Argon Gas Regulator 8134140 Welding Apron 6000920 Gauntlets Leather (EN407 rated) 8133492 Welding screen WSC2 and replaacement screen 6000945 6000910
Parts & Service: 020 8988 7400 / E-mail: Parts@clarkeinternational.com or Service@clarkeinternational.com ARC ACTIVATED HEADSHIELDS These highly popular head-shields activate instantly when the arc is struck and allow you to have both hands free when welding. ENVIRONMENTAL RECYCLING POLICY Through purchase of this product, the customer is taking on the obligation to deal with the WEEE in accordance with the WEEE regulations in relation to the treatment, recycling & recovery and environmentally sound disposal of the WEEE. In effect, this means that this product must not be disposed of with general household waste. It must be disposed of according to the laws governing Waste Electrical and Electronic Equipment (WEEE) at a recognised disposal facility. If disposing of this product or any damaged components, do not dispose of with general waste. This product contains valuable raw materials. Metal products should be taken to your local civic amenity site for recycling of metal products. GUARANTEE This CLARKE product is guaranteed against faulty manufacture for a period of 12 months from the date of purchase. Please keep your receipt as proof of purchase. This guarantee is invalid if the product is found to have been abused or tampered with in any way, or not used for the purpose for which it was intended. Faulty goods should be returned to their place of purchase, no product can be returned to us without prior permission. This guarantee does not effect your statutory rights. Model Arc Activated Grinding function Solar Powered Fixed Shade Flip Up Part Number GWH4 X X X 6000706 GWH5 X X X 6000707 GWH6 X X X 6000708 GWH7 X X X 6000709 GWH8 X X X 6000714 PG4 X X X 6000716 HS1 X X 6000700 HSF1 X X 6000705
Parts & Service: 020 8988 7400 / E-mail: Parts@clarkeinternational.com or Service@clarkeinternational.com DECLARATION OF CONFORMITY - UK
Parts & Service: 020 8988 7400 / E-mail: Parts@clarkeinternational.com or Service@clarkeinternational.com DECLARATIONS OF CONFORMITY - CE